 Charonyu
How to shrink an application photo to under 500KB on your phone
Application photos often require "under 500KB, set pixel dimensions, JPG format" all at once. Understand the three conditions, then use built-in iPhone tools or PassSize to get the photo under 500KB at the right size.
 Charonyu・Guide・

PassSize, mentioned in this guide, is currently in review · coming soon and can't be downloaded yet. Until it launches, you can use the built-in methods described here; this spot will turn into a download link once it is live.
Quick answer
Application photo rules usually have three parts: file size (for example under 500KB), pixel dimensions (for example 600 wide × 800 tall) and format (mostly JPG). iPhone has no built-in “compress to 500KB” button. The free approach is to crop to the required ratio, then use the Preview app (iOS 26 and later) to resize to the required pixels, export as JPEG and lower the size with the Size slider, and finally check in the Files app that it’s under 500KB. To set the target directly, use an app that lets you specify a size, such as PassSize: choose a photo > set the target to 500KB and limit the dimensions if needed > save. It works on your phone, with no upload to a compression site.
Supported versions and screenshot notes
- The Preview method in this article applies to iOS 26. On iOS 18 you can use Shortcuts. Button names may change with minor system versions.
- PassSize requires iOS 18 or later and is still in App Store review, so it can’t be downloaded yet. The screenshots below are from a development build, using sample files to show where the controls are. They are not the result of this test.
- Submit the exported copy and keep your original. After cropping, converting and compressing, check the size again.
What rules do application photos usually have?
Requirements differ by organization, so always follow the official guidelines, but common conditions look like this:
- Maximum size: 500KB, 1MB and 2MB are most common. Occasionally there is a minimum such as “must not be smaller than XX KB”.
- Pixel dimensions: for example “600 pixels wide, 800 tall” or “at least 413×531”. Sometimes only the ratio is specified (for example 3:4).
- Format: JPG/JPEG is most common, some accept PNG, and HEIC is often rejected.
- Content: recent, facing the camera, white or light background, not heavily retouched, face clearly visible.
Note that “size” and “dimensions” are different: size is how many KB the file is, and dimensions is how many pixels the photo has. For how they relate, see What does a 1200×1200 photo size mean?
Why do phone photos often exceed 500KB?
iPhone photos are usually 12 megapixels or more, and a single photo is often 2-5MB, several times 500KB. The good news is that application photos usually need only a few hundred by a few hundred pixels, so shrinking the dimensions to what’s required makes the file much smaller on its own, and then a small tweak of JPEG quality gets it under 500KB.
Method 1: piece it together with iPhone’s built-in tools
-
Crop: Photos app > open the photo > Edit > Crop. Crop out extra background and set the ratio the guidelines ask for (for example 3:4). Fewer pixels means a smaller file, but you can’t control the exact KB.
-
Preview app (iOS 26 and later): first Share from Photos > Save to Files, then open it in Preview, tap More > Resize and set the pixels. Then from the menu beside the file name tap Export, choose JPEG and lower the file size with the Size slider. It works, but you have to keep checking that it’s under 500KB.
-
Shortcuts app: build the resizing and JPEG conversion into a shortcut. This suits people who do it often. For setup, see How do I batch-shrink photos with an iPhone shortcut?
The built-in methods are free, but often take several tries. If you don’t know how many KB the result is, long-press the file in the Files app > Get Info to see its size.
Method 2: compress straight to 500KB with PassSize
PassSize is designed for uploads that have a size limit, so it fits the application scenario well:
- Pick 500KB as the target, or enter a custom size (for example a safer 450KB).
- It finds the highest usable quality that doesn’t exceed the target, so you don’t have to guess. The target is counted with 1000-based units and about 2% buffer is kept.
- You can limit the dimensions, for example 600×800, as a maximum pixel size. To get exact width and height, crop to the correct ratio first.
- HEIC can be converted to JPG along the way.
- Compression runs on your phone, so ID photos aren’t uploaded to a compression site.
- If it still can’t reach the target, the app tells you how many files are still over and suggests reducing the dimensions or changing the target.
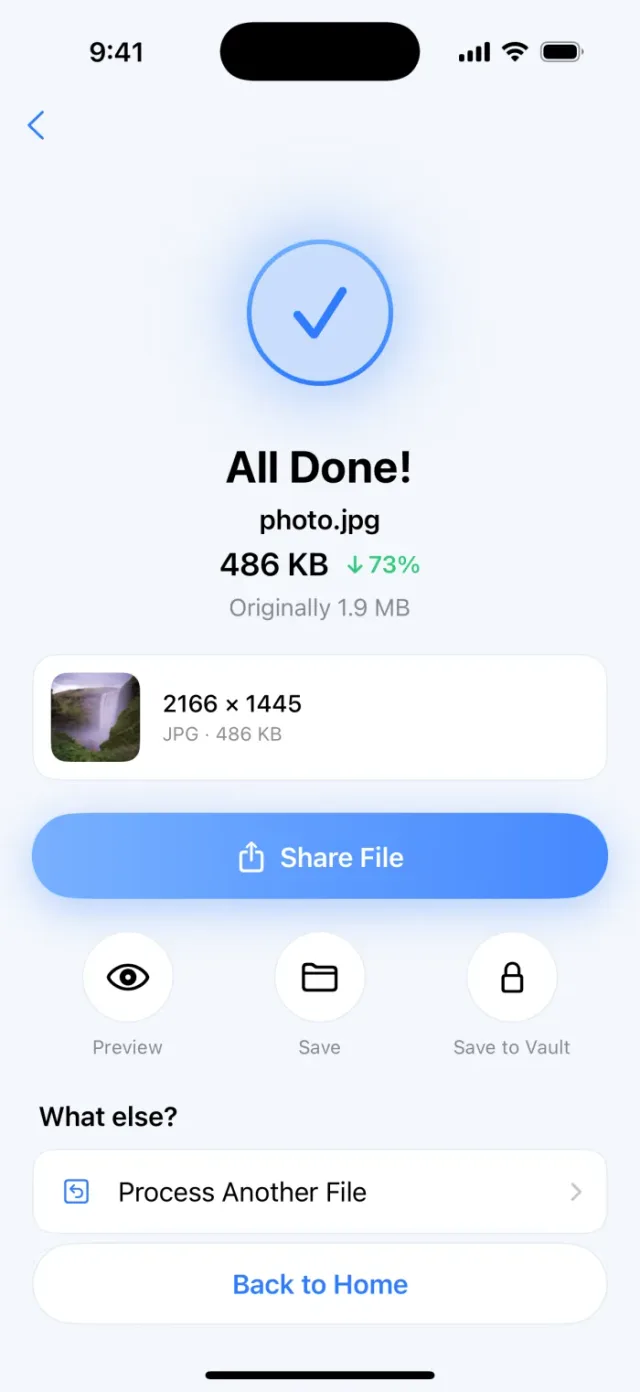
You can also type something like “500kb” or “600x800 to JPG” and the app understands your limits. The steps are shown above.
Comparing the methods
| Method | Can set 500KB | Can set pixels | Uploads the photo | Cost |
|---|---|---|---|---|
| Crop in Photos | No | Only through cropping | No | Free |
| Preview: resize + export | No (try with the slider) | Yes | No | Free (iOS 26 and later) |
| Online compression sites | Some can | Depends on the site | Yes | Mostly free with ads |
| PassSize | Yes | Yes | No | 5 free uses, then NT$60 one-time purchase |
To compare more tools, see Where should I compress images?
Tip: after compressing, zoom in on the face and background, then check “size, dimensions, format” against the guidelines one by one. Many rejections are because of a HEIC upload or the wrong pixel dimensions, not because the file was too big.
What we actually measured
On 2026-10-08, on the iPhone 16 Pro simulator, iOS 18.4, we tested using PassSize’s existing ImageProcessor compression engine. The input was a JPEG of gradient plus noise generated from a fixed seed, 4032×3024, 3,632,702 bytes. It is not a real portrait.
| Target | Actual output | Output pixels | Target met |
|---|---|---|---|
| 2MB (2,000,000 bytes) | 1,938,809 bytes (about 1.94MB) | 4032×3024 | Yes |
| 500KB (500,000 bytes) | 489,408 bytes (about 489KB) | 1933×1450 | Yes |
With the same test image, compressing to 2MB kept the original pixels, while compressing to 500KB reduced the dimensions. This shows that meeting the file size limit doesn’t mean keeping the original resolution, and guidelines with set pixel requirements still need to be checked separately. This is an engine test, not a full submission test on a real device, and it didn’t measure face or text clarity, so you can’t infer that every photo gets the same result. All 7 existing engine tests also pass, and invalid JPG input is correctly rejected.
Three common snags with 500KB submissions
- Under the maximum but below the minimum size: simply raising the target doesn’t necessarily enlarge the file. Re-export from the original with higher quality or the larger required pixel size, then test the size. Don’t force it by converting repeatedly at low quality.
- 600×800 turns into 600×400: limiting the maximum dimensions keeps the original aspect ratio and doesn’t stretch it to arbitrary pixels. Crop to 3:4 first, then export at the required width and height. Each application system has its own requirements.
- 489KB still can’t be uploaded: check the JPEG format, file name, minimum pixels and whether you chose the original file. File size is only one of the checks, and compressing smaller won’t fix a format error.
Official source and next steps
The built-in export method follows Apple: Export or compress images in Preview on iPhone. For other situations, pick a tutorial from the complete guide to photo and PDF compression.
Continue with the complete guide: The complete guide to compressing photos and PDFs on iPhone →
Steps
- 1
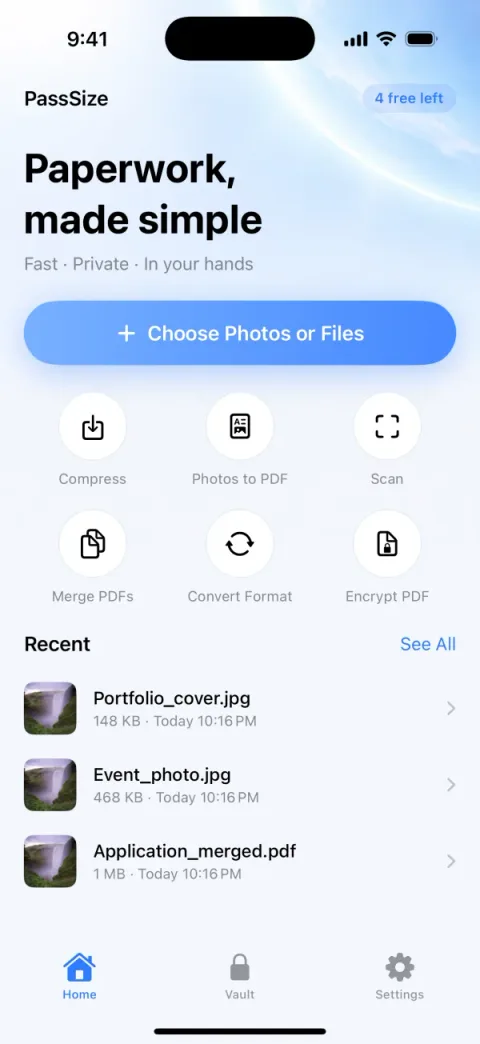
Import the application photo
Open PassSize and choose the photo to upload from your library or the Files app. HEIC photos can be chosen directly.
- 2
Set 500KB and the dimensions
Choose Compress and set the target size to 500KB. If the application guidelines specify pixels, limit the width and height too, for example 600×800.
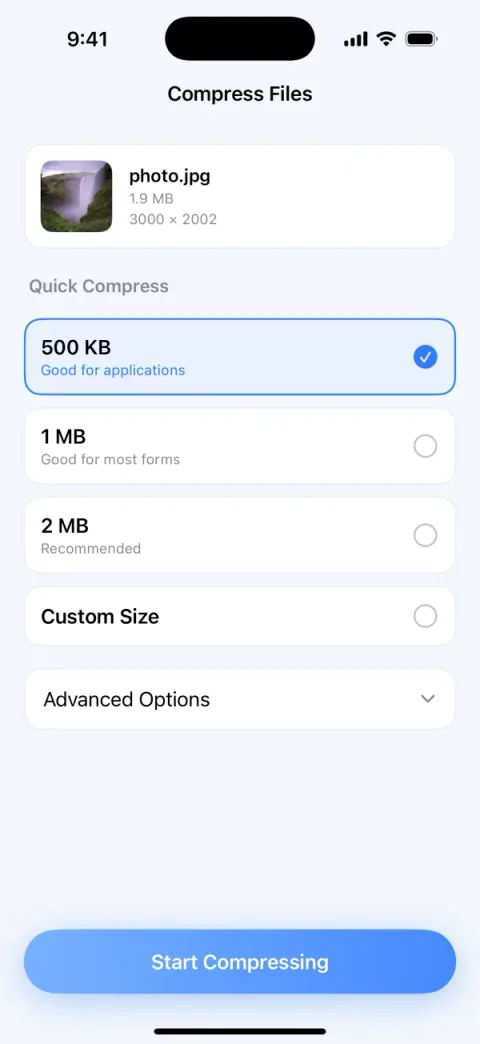
Real interface from a development build with 500KB selected. The sample file numbers are not a compression test result. - 3
Check the result, then save
When it finishes, it shows the size and dimensions before and after. Confirm they match the guidelines, then save to your library or share it straight to where you will upload.
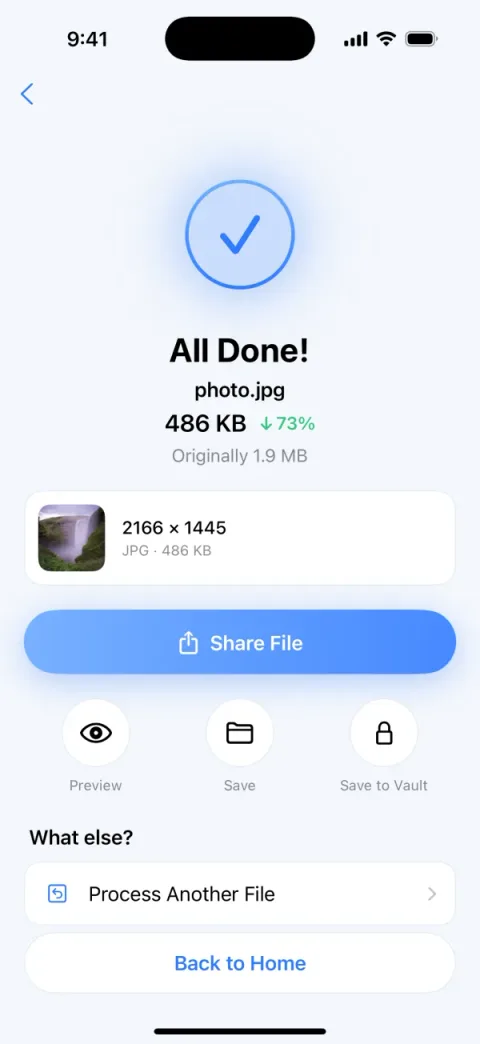
Screens are examples; actual file sizes vary by photo.
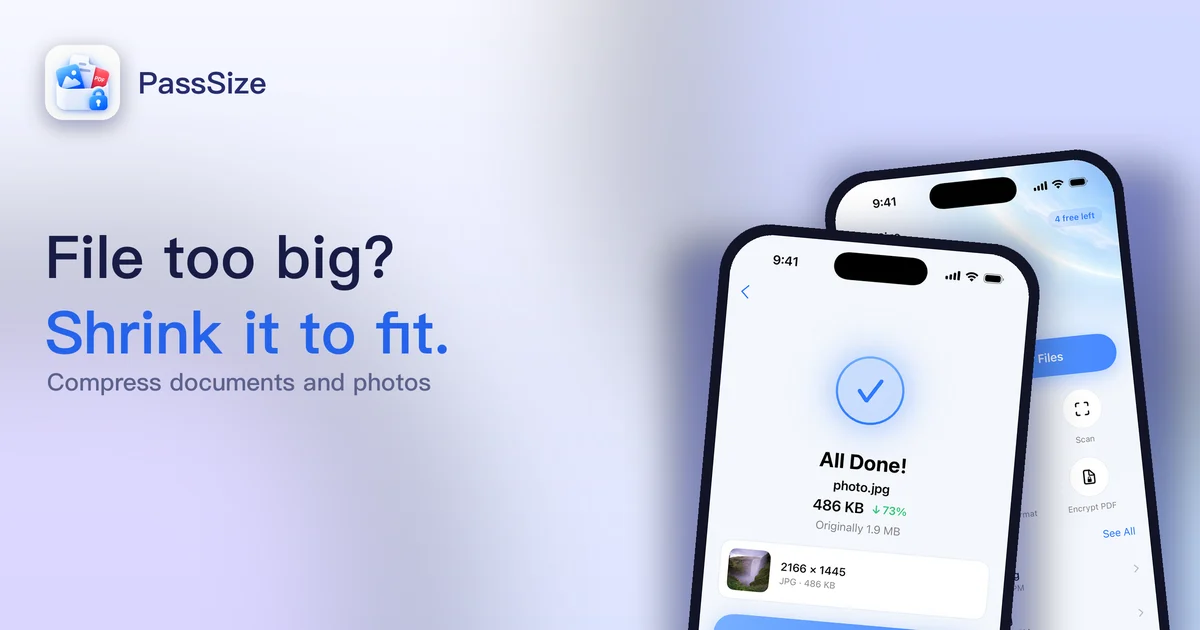
Disclosure: PassSize is an app developed by this site's author (Charonyu). The built-in methods and other options described here all work without downloading our app.
FAQ
Will a 500KB photo be too blurry and get rejected?
A normal headshot or ID photo is usually still clear at 500KB, because the image is simple and doesn't need many pixels. Zoom in after compressing to check the face is clear. When a photo is rejected, it is often because of format, pixel dimensions or background, not necessarily the 500KB limit.
The site says 500KB. Is 499KB OK?
The site might count KB as 1000 or 1024 bytes, so values right at the limit are risky. Leave some buffer, for example aim for around 450-480KB, and you won't have to worry about the counting method.
The guidelines also say "minimum 300KB". Do I need to meet that too?
Some systems have both a lower and an upper limit. If the result is below the minimum, there are too few pixels or the quality is too low. Raising the compression target alone doesn't necessarily make the file bigger. Re-export with a larger pixel size or higher quality within the allowed range, then check the size falls inside the range.
Can I upload a HEIC photo?
Most application systems accept only JPG (sometimes PNG too). The safest approach is to convert to JPG first, then compress to under 500KB.