 Charonyu
Too many photos on your iPhone? How to clean them up and delete them quickly
Delete screenshots, big videos and duplicates first, use Select and drag your finger to pick a whole stretch at once, and check Recently Deleted afterwards. Built-in methods, where things moved in the newer Photos app, and the swipe cleanup flow in Swipee.
 Charonyu・Guide・

Quick answer
Start with the photos that are easiest to judge: screenshots, long videos and duplicates. In the Photos app tap Select, and drag your finger across the thumbnails to select a whole stretch at once, then tap the trash can to delete. For duplicates, go to Collections > Utilities > Duplicates and merge them (iOS 26 and later). Deleted photos stay in Recently Deleted for 30 days. If you’d rather look through photos one by one without getting tired, use Swipee to swipe left to mark for deletion and right to keep, month by month.
First, what happens when you delete?
- Deleted photos and videos go to Recently Deleted and are kept for 30 days before being permanently removed. During that time you can recover them, but they still take up space. If you delete them manually from Recently Deleted, that’s permanent and can’t be undone.
- With iCloud Photos on, deletion syncs to every device signed in to the same Apple Account and to iCloud.
- “Remove from Album” in an album you created isn’t deletion, and the photo is still in your library.
Method 1: batch delete with Select and drag (built in)
- Open the Photos app and tap Select at the top right of the library.
- Press your finger on the first thumbnail, drag across that row without letting go, then slide down. Every photo you pass over gets selected.
- Tap the trash can icon to delete.
This works when you want to get rid of a whole stretch, such as a pile of price-comparison product photos from one day.
Method 2: filter out screenshots and videos first (built in)
In iOS 26, the Photos app has two tabs, Library and Collections:
- Collections > scroll down > Media Types lets you open Screenshots, Videos, Bursts and other types separately. Screenshots are usually the easiest to judge, so you can clear them in one go.
- In the library, tap the filter button and choose Filter to show only specific items such as Videos.
- If you don’t want screenshots mixed into your library, use View Options in the same menu to hide Screenshots (they’re only hidden, not deleted).
Videos are usually much bigger than photos. A few minutes of 4K video can be hundreds of MB to several GB, so handling videos first frees the most space the fastest.
Method 3: merge duplicates (built in)
On iOS 26 and later: Photos > Collections > Utilities > Duplicates > Merge. On iOS 18, scroll down to Utilities on the Photos home screen. For details and limits, see How do I find duplicate photos on iPhone?
A practical order for cleaning up
- Screenshots: easiest to judge, almost no thinking needed.
- Long videos: frees space fastest.
- Duplicates: let the built-in feature merge them.
- The rest, by month: one month at a time is far easier than facing tens of thousands of photos.
- Finally, check Recently Deleted. Delete manually only if you need the space right away. Back up important photos first, because permanent deletion can’t be undone.
For why cleanup often “never ends” because of the method, see Why does cleaning up your photos never seem to finish?
Decide one by one quickly with Swipee
The built-in tools are good at batches, but tapping through the thousands of photos that need one-by-one judgment is tiring. Swipee turns that step into swiping:
- Four-way swipes: swipe left to mark for deletion, right to keep, up to add to Favorites, and down to add to a chosen album, with undo.
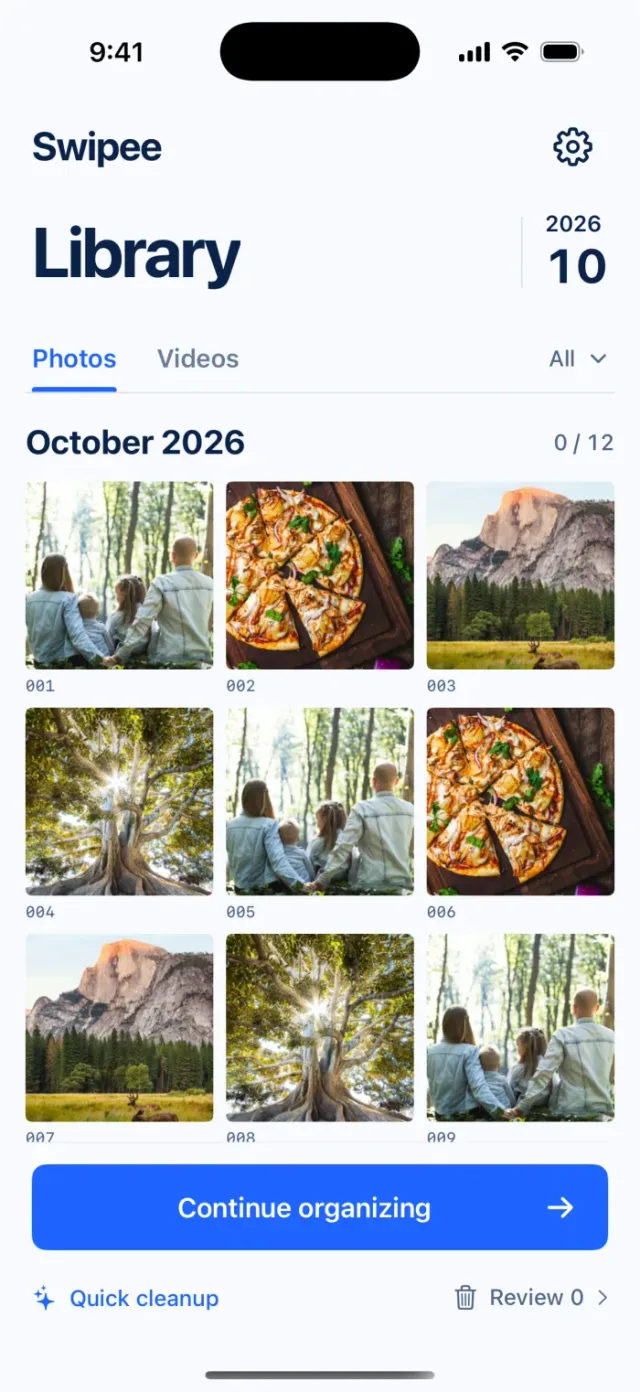
- Clean up by month: browse photos and videos by month and pick up where you left off.
- Content category suggestions: pick a date range and try topic or people grouping suggestions (may be inaccurate and don’t identify people by name), then add the selected photos to an album.
- Photo comparison: check photos taken close together in time side by side (grouped by capture time, so they aren’t guaranteed to be duplicates), look at each one, then choose to keep or mark for deletion.
- Quick Scan (Beta): checks old screenshots, similar images and more on your device, with up to 20 suggestions at a time. Nothing is selected by default and nothing is deleted automatically. It may miss or misjudge items.
- Review first, then delete: review the items marked for deletion and restore them one by one or keep them all. The actual deletion still needs confirmation from Apple’s Photos system.
Comparing the methods
| Method | Good for | Judge one by one | Cost |
|---|---|---|---|
| Select + drag | A whole stretch you don’t want | No | Free |
| Media Types / filter | Screenshots, videos | Partly | Free |
| Merge duplicates | Exactly identical photos | No | Free |
| Swipee | The remaining photos you decide one by one | Yes, by swiping | Free |
Tip: if your free space doesn’t go up right after deleting, it’s usually because the photos are still in Recently Deleted. Go to Collections > Utilities > Recently Deleted, unlock it, tap Select and delete, and the space is released (the storage number may take a while to update). This step is permanent, so do it only when you’re sure you don’t need them or have already backed them up.
iOS versions and screenshot source
| System | Where Duplicates and Recently Deleted are |
|---|---|
| iOS 18 | Scroll down on the Photos home screen to Utilities |
| iOS 26 | Photos > Collections > Utilities |
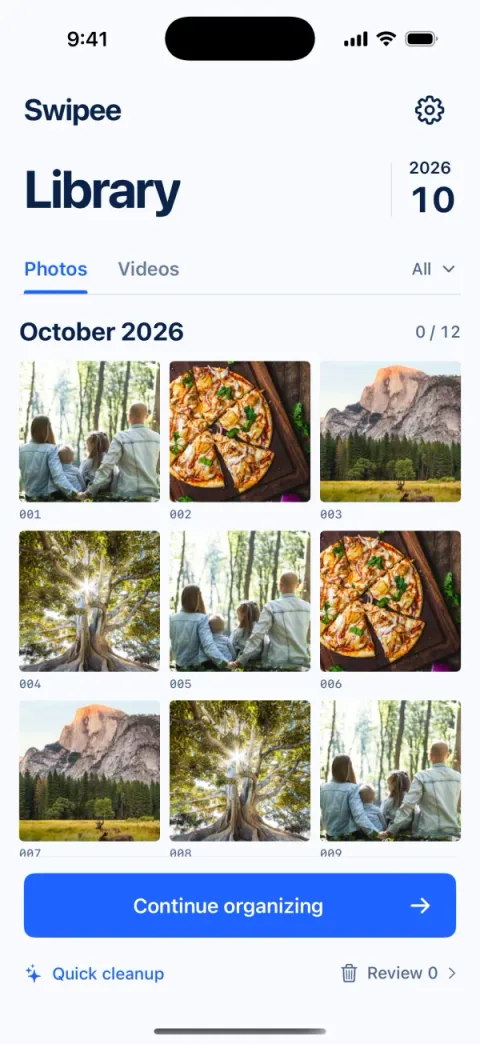
The screenshots below are from the Swipee development build of 2026-10-04, showing month selection and per-photo decisions. On 2026-10-08 we checked that the App Store Connect version 1.2 description includes four-way swipes, categories and Quick Scan Beta. If your screen looks different, check your version first. The photo counts in the screenshots don’t represent cleanup results.
What we checked this time
On 2026-10-08 we compared the app project with the original interface screens and confirmed the interface presents marked for deletion, kept and undo separately, then checked iCloud sync and the 30-day recovery period against Apple’s official documentation. We didn’t run any deletion on a private library, and we didn’t measure “how many thousand photos in how many minutes” or how much storage was freed, so we make no such claims.
When you try it yourself, start with a few photos you’ve already backed up: swipe one to mark for deletion > undo > check the original is still there. When you do need to delete, check the system confirmation, then look in Recently Deleted to confirm you can recover them. Don’t test permanent deletion on important memories.
Common failure cases
- An app sees only some of your photos: first check whether photo access is set to Limited Access, and don’t assume the photos disappeared.
- Space didn’t increase after removing from an album: that only removes the grouping, and the original is still in the library.
- The number didn’t change after deleting: check Recently Deleted and wait for the system to update the storage figures.
- Duplicates don’t appear: the system may not have finished analyzing, or may have found nothing to merge. Don’t treat similar photos as duplicates.
Official source and next steps
Deletion, recovery and iCloud sync follow Apple: Delete photos on iPhone or iPad. If you need to back up first, deal with permissions, or find space isn’t freed, work through the complete guide to photo library cleanup in order.
Continue with the complete guide: iPhone photo library cleanup and storage guide →
Steps
- 1
Pick a month
Open Swipee and choose a month on the timeline to start, so you don't have to face the whole library at once.
- 2
Swipe to decide what stays
Look at photos one by one. Swipe left to mark for deletion, right to keep, up to add to Favorites and down to add to a chosen album. You can undo if you change your mind.

Swipee's interface. Swipe left to mark for deletion first, swipe right to keep, and tap Undo to reverse. - 3
Review before deleting
Review the items marked for deletion and restore them one by one or keep them all. The actual deletion still needs confirmation from Apple's Photos system. Deleted photos go to the system's Recently Deleted first, and you can recover them within 30 days as long as you haven't permanently deleted them there.
Screens are examples; actual file sizes vary by photo.
Disclosure: Swipee is an app developed by this site's author (Charonyu). The built-in methods and other options described here all work without downloading our app.
FAQ
Is there a faster way to delete many photos than tapping one by one?
Yes. In the Photos app tap Select, drag your finger horizontally across the first row of thumbnails and then slide down. Every row you pass over gets selected, and you tap the trash can once to delete them all.
Can I get deleted photos back?
Yes. Deleted photos and videos stay in Recently Deleted for 30 days and can be recovered during that time. After 30 days, or after you delete them manually from Recently Deleted, they are permanently removed and can't be recovered.
If iCloud Photos is on, does deleting on iPhone affect my other devices?
Yes. With iCloud Photos on, photos deleted on iPhone are also deleted from other devices signed in to the same Apple Account and from iCloud, so back up anything you want to keep first.
Is removing a photo from an album the same as deleting it?
No. "Remove from Album" in an album you created only takes away the grouping, and the photo is still in your library. To actually free space you have to delete it from the library.
I swiped the wrong way while cleaning up with Swipee. What now?
Swipee has Undo, and you can also restore items one by one in the list marked for deletion. The actual deletion still needs confirmation from Apple's Photos system, and deleted photos go to Recently Deleted first, where you can recover them within 30 days as long as you haven't permanently deleted them there.